What are Microgreens?

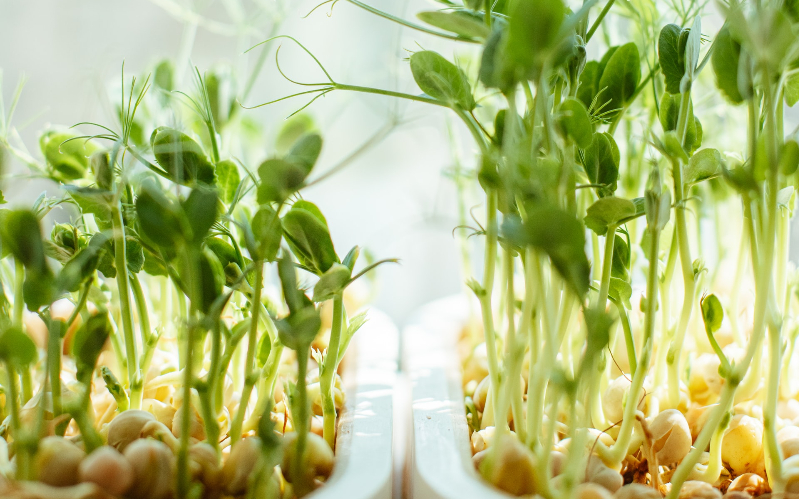
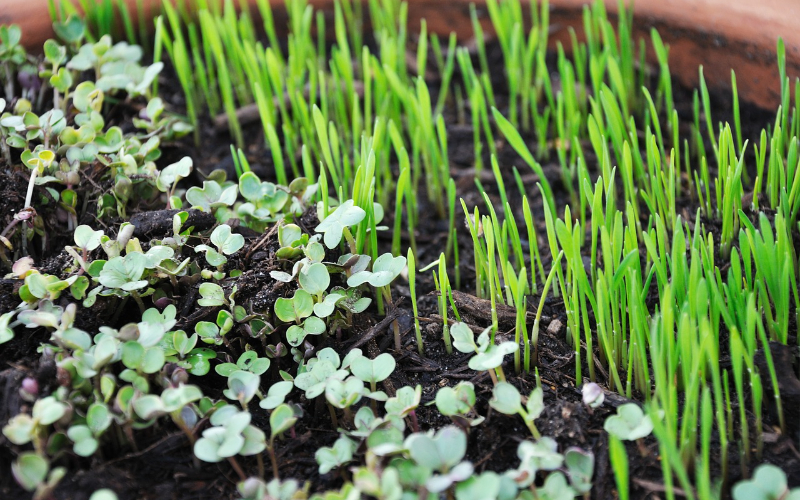
The fresh and young seedlings of herbs, grains, veggies and beans are called Microgreens. The seeds are grown in bulk in a uniform flat vessel for a short span of time. Number of microgreens with different colors and flavours can be grown.
Microgreens can be eaten raw or can be included in salads or smoothies or sometimes as condiments.
Reasons to consume Microgreens?
- By growing microgreens, we will be able to consume it fresh and with rich nutrients as the nutrients will be lost during storage.
- Most of the microgreens comprise phytonutrients which elevate health and build immune power.
- By having microgreens grown at home, we can avoid the usage of single-use plastics available with the vegetables from supermarkets.
Types of Microgreens grown?
Based on the level of difficulty of growing microgreens, they can be classified as follows
1.Easy level
These can be from Brassica family
Radish, Mustard, Kale, Rocket, Broccoli, Mizuna, Kohlrabi, Cabbage
2. Medium level
Fenugreek, Leek, Celery, Anise, Peas, Sorrel, Dill, Coriander, Fennel, Parsley
3. Hard level
Carrots, Chives, Sunflower, Perilla, Cress, Basil, Amaranth, Beets
Apart from providing sufficient nutrients, microgreens also happen to be extraordinary indoor gardens.
Why are microgreens unique?

- Microgreens can be grown on dining or kitchen counters as well as window sills of our homes.
- These baby plants boost up the flavour in prepared dishes.
- Healthcare is extra when compared to the grown plants because of the high content of nutrition.
- Easy to grow
- Resourceful technique to make use of older seeds. THickly planted to avoid a lesser rate of germination as ageing.
Skills required to grow microgreens:
- Growing microgreens can be a considerable means to start home gardening for beginners as it is an easier process and the results are way faster when compared to growing full-sized plants.
- No extraordinary skills are required to grow microgreens. As the time span between seeds grown to edible microgreens is rapid, the number of problems regarding care are reduced.
- A primary skill required is to have a focus on the seeds or plants to conserve ideal content of moisture and exposure to sunlight.
- It is required to maintain an adequate level of moisture without keeping them too wet. It is required to have more water content than a full-sized plant but overwatering results in infections like mold or any other fungal problems.
- Sufficient sunlight exposure is required to facilitate the process of photosynthesis as well as the growth.
How to grow microgreens?
Microgreens can be grown on soil or can also be grown hydroponically.
1. Early step for Microgreens grow:
- Choosing the microgreens
- Gathering the required tools and medium
- Planting the seeds
- Watering
- Exposure to sunlight
- Harvesting
- Choosing the microgreens
Choose a microgreen on which you want to try your hands. Microgreens like radish, brocolli, cabbage, celery and coriander etc can be grown. These can be grown faster within a week or two.
You can also choose microgreens of specific nutrients that you are concerned with.
After selecting, the seeds can be purchased from local farmers, grocery stores, online or also the leftover seeds.
2. Gathering the required tools and medium
Specific seed trays or the containers from the home or kitchen which can be reused can be used for growing microgreens.
When growing the microgreens in bulk it’s better to use seed trays which are designed according to the germination requirement and also with the holes to discard excess water. These can be purchased in local markets, gardens or online. Ventilated dome lids matching the tray size can be purchased which allows sunlight to pass through and helps in maintaining required humidity level.
Strawberry containers, salad containers, cupcake containers, egg cartons, frozen food trays can also be reused to grow microgreens.
Having premium quality media is essential in this process which should possess a moisture holding capacity, and should also arrange an empty space for the air around the roots. Commercial potting soil was used but currently coconut coir is being used frequently.
- Water:
Water is essential to keep the growing media moist and also to control relative humidity required for the microgreens to grow. Well water, bottled or rain water can be used. Avoid distilled waters and it,s also better to avoid softened water as it comprises more amount of salts which can be injurious to the microgreens.
- Sunlight:
Sufficient amount of sunlight is necessary for the process of photosynthesis. If the microgreens are grown indoors make sure to provide 12 hours of sunlight. Incandescent lights or fluorescent bulbs can be used in case of no sufficient direct sunlight.
Fertilizers or compost are optional to enhance the growth.
- Shaker
Shakers can be used to evenly sprinkle the seeds that have to be grown. An empty bottle can be poked to make holes according to the size of the seeds.
2. Pre-soaking the seeds:
Soaking the seeds for 10 to 12 hours results in a better germination rate. Sanitizing the seeds by including a little amount of food-grade 3% hydrogen peroxide in the water can reduce the mold.
3. Filling the tray:
Initially add a sufficient amount of soil in the container and ensure that it is ~1 inch to the brim for a smoother harvest for shorter plants.
Take around 1oz of seeds in the shaker and sprinkle evenly onto the soil.
To induce the rate of germination, a thin layer of soil is coated on the naked seeds and mound with a tray on the top to compress the soil for a few days during the blackout period where they are placed in a dark space.
Blackout period is necessary for the healthy microgreens for 5 to 6 days during which the plants will acquire the light naturally by using the stored starch in the endosperm.
4. Watering
Watering twice a day is well and good to maintain the moisture content in the soil. The problem of overwatering is avoided when trays with the holes are used. Soggy or flooded soil will damage the seedlings.
Bottom watering method can be followed where a second tray is placed and is filled with water. Water is sucked towards the soil through the capillary action.
5. Exposure to sunlight
After the blackout period, it is required to keep them under the light. As direct sunlight might be harsh on them, it’s better to place them under a shaded corner. T8 fluorescent light tubes can also be used.
At this phase the process of photosynthesis takes place and the plants start turning into fresh green colour.
6. Harvesting
Microgreens usually take around 8 to 10 days to be ready for harvesting, some take around 2 weeks. In the case of microgreens, the process of harvesting is simple where you will have to trim them gently above the level of soil using a scissors or a knife.
The microgreens are ready to consume after washing.


